We get lots of questions each week about OdiCoat, so I thought it was about time that I tested it out on a full project from start to finish.
So what is it?
This is what it says on the tin...
Odicoat is a fabric laminator - once applied to fabric it becomes both waterproof and washable.
It allows you to protect your projects, fabric accessories and create an oil cloth finish to your fabric. Once dry it creates an insulating film that resists against stains and humidity inside and out. It can also be used as an adhesive for fabrics or on all wood, ceramic, pottery, glass, cardboard, metal styrofoam, stone etc.
This product is ideal for toiletry bags, tablecloths, placemats, aprons, embroideries, etc.
My OdiCoat Project
I decided to make a placemat - a super simple project for a first time OdiCoat user. I wanted to get a feel for how far one pot of OdiCoat would go, as understandably we get asked about this a lot! I used a linen fabric with a square design woven into it. Ultimately the aim was to create a waterproof place mat with an oil cloth finish.

My first consideration was the order of action - was it best to OdiCoat and cut, or cut and OdiCoat?
Both options work - it is really up to you whether you would prefer to apply the OdiCoat and then cut your fabric or vice versa. You will use less OdiCoat if you cut and then apply. If you have fabric prone to fraying you might prefer to OdiCoat and then cut.
How to use OdiCoat for waterproofing (these are the steps from the pot with my thoughts added in):
1. Put the fabric on a flat protected surface, that is also non-stick and smooth. For example, a large plastic mat that you don’t mind getting a bit gluey. I didn’t have this so I used a flat table top with baking paper to protect it. Do not use paper or fabric or anything that it will stick to easily, as it’s important to remember that this product is also a fabric glue.

2. I’m adding an extra step in here (which may be obvious to some, but I think it worth mentioning) - make sure you iron the fabric that you are planning on OdiCoating - I did find that in places once the OdiCoat was applied, the creases never fully ironed out. However I was using linen which is prone to creasing, so if I was to do this again I would either give it a really good iron before applying or I would choose a less crease-prone fabric, such as cotton.

3. Spread the OdiCoat with a flat brush or an old credit/store card. Applying the layers evenly is key. Allow to dry for 1 hour before applying the second coat.

4. Apply a second coat of OdiCoat. Allow this to dry for 1 hour.

5. Apply a third coat of OdiCoat and allow to dry for 24 hours.
6. Iron the fabric with OdiCoat using a layer of parchment paper (I used baking paper) as protection. Once the fabric has been ironed you can launder in warm water.

The sewing part
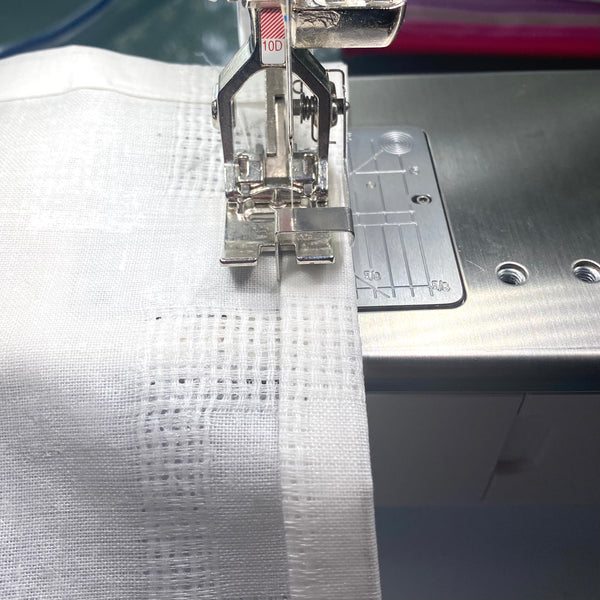
7. Remember that when you iron the fabric in preparation for sewing (for example, pressing a hem) continue using the parchment paper to protect the iron and fabric. Place the parchment paper between the iron and OdiCoated fabric as otherwise you may have a melted mess.

8. I was a little nervous about the sewing part as I wasn’t sure how my machine would cope with this thick, now plastic-like fabric. I have quite a beefy machine with built in dual feed so the sewing part turned out to be a breeze. If your machine struggles, I would suggest a walking foot and strong needle (such as a jeans needle). I’ve seen others suggest a Teflon foot.

I simply mitred the corners on the fabric and sewed around the edge. You will find a tutorial on how to mitre corners here.

Follow these steps for collage and fabric embellishing:
1. Using a flat brush, apply the glue to the base surface. Then apply your fabric to be used as an embellishment to the base fabric.
2. When you have finished adding your embellishment, cover the whole project with one layer of OdiCoat.
3. For optimum protection of your project, put down two layers of OdiCoat at 1 hour intervals.
After drying for 24 hours the treated object will have a satin aspect and will resist to cleaning and wear. Perfect for indoor and outdoor decorating as well as embellishing of clothing and accessories.
So how far did the 246g of OdiCoat go?
When using OdiCoat for waterproofing I was able to cover the equivalent of a 150cm x 120cm piece of fabric, perhaps slightly more. I do feel that the type of fabric that you are using will impact how much of the product is absorbed, so this isn’t an exact amount, but will hopefully give you an idea of how much you’ll need.
You may need to use less OdiCoat for fabric embellishing, depending on the number of layers you require.
Overall
I was actually really impressed with this product and I can definitely see me using this again. Although a little messy (perhaps that was more to do with my ‘helper’!) it was very easy to use and provided good results.
Here is said helper testing out the efficiency of the placemat.

2 comments
Good Afternoon,
My name is Megan, from The Akira Team – I just noticed your website through your Entireweb Website Listing, and wanted to get in touch with you right away.
We have a special offer for your website today, and that is 1st Page Rankings in all major search engines (That’s Google, Yahoo and Bing) + social media and video commercial advertising starting at just $29.99 which I am ABSOLUTELY certain will benefit your website and business, by bringing you LOTS of new customers, very very quickly.
Visit useakira.com if you want your website to be at the TOP of Google, Yahoo and Bing, AND we can get you started immediately. Or visit useakira.com/11yearexclusive.html in the next 12 hours for a HUGE half price offer + your 2nd year free of charge.
I look forward to hearing back from you.
Cheers!
Megan
The Akira Team
Executive Page One Relations
wfjp860qguh
Hi there – I’m looking to use this on some fabric to make a tablecloth so a fair bit bigger than a placemat alas. I won’t have parchment wide enough to put the tablecloth on to coat it, but do you think it would be ok to use an old shower curtain liner in place of the parchment for the application process? I could then use pieces of parchment to sandwich the fabric when I iron it in sections after. Just wondering if you think the shower curtain liner may work for the application step as I plan on laying that on the floor then the fabric on top of that as I don’t have a work surface big enough. Thanks! Erin x