I love invisible zips. They are, in my opinion, the easiest to insert, but I also love that you can shorten them. This means if you've a few long ones in your stash you're set to go, whatever the project! I've used the nylon coil type here.
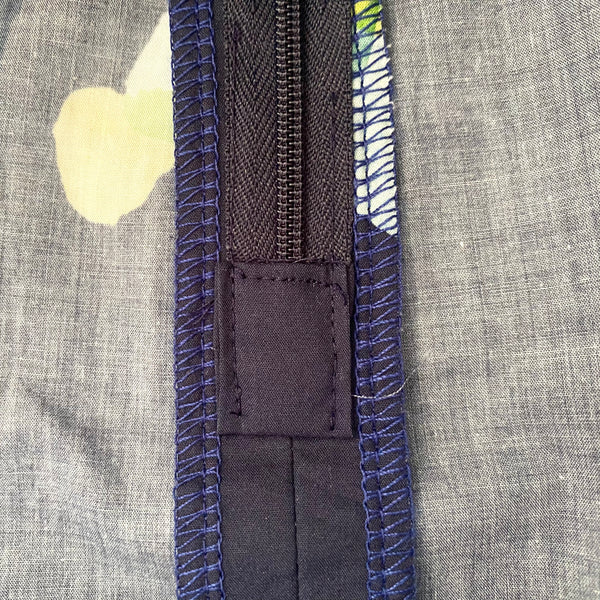
Here's how I like to shorten mine. I've used contrasting fabric, thread and zip in the photos here so it is easier to see, however if possible matching these colours will provide the most seamless results.
Alternatively you might prefer to shorten your zip before inserting it, which is totally fine too:) If so, complete steps 2 - 10 and then complete step 1 last.
1. Insert zip, however you prefer to do this. Keep the zip longer than needed if you are shortening at the end.
2. Cut thezip to the desired length whilst the it is closed. To make it easier to work with leave about 5 cm extra on the zip. A note on the cutting... most invisible zips are made of nylon coil teeth, therefore it's fairly easy to cut them, however I wouldn't use your best dressmaking scissors for this job as it will blunt them.


3. Cut your self a strip of fabric about 5 cm long x 2 widths of zip. This can be from the same fabric as the garment or a piece of binding that you might have laying around.

4. Place the strip centred to the back of the zip and right sides together. The length of the strip should point toward the top of the zip. The raw edge should line up with the bottom of the zip. Stitch across with around a 1 cm seam allowance. Go slowly over the coils to make sure your needle doesn't break.

5. Press the strip downward towards the hem of the garment.

6. Press the side edges in again, but this time use a little sewing glue to hold them in place. A little press with the iron will help to secure the glue.

7. Fold over the opposite end and again use a little glue to hold in place.

8. Fold over again around the bottom of the zipper. Try to line it up with the original line sewn on the back of the zipper. Use a little glue to hold this in place.

9. Sew a box from the front to hold this in place.


10. Using a zipper foot attach the tape of the bottom of the zip to each side of the seam allowance. This will hold it down and stop it flapping around inside your garment. Make sure you are only stitching through the seam allowance and not the main garment.


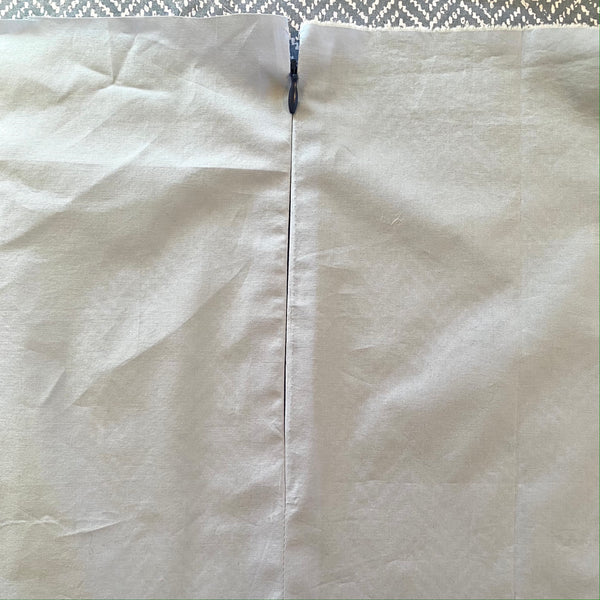
This is how it looks when you use matching fabric, zipper and thread.