Firstly a note of caution, it is wise to have a practice with these before using them on your garment. You’ll get a better feel for how it works.
1. I practised with a double layer 100% cotton loop back jersey. I doubled it up because you’ll probably be attaching eyelets to fairly thick fabric. I also interfaced one side of the garment for added stability. We tried installing an eyelet to a single layer of fabric and found that it didn’t work as well.


Here are the Prym Vario Pliers.

There are two holes in the mouth of the pliers for the various attachments.

2. To begin with you will need the following two attachments in your Vario pliers, as shown in the photos below. These are the cutting tools. Mark where you would like your eyelet to go and press the pliers together in this spot to create a hole for your eyelet. You will hear a click when the hole is made. Give a firm squeeze.
If the cut fabric gets stuck in the pliers you can easily hook this out with a pin.


Remove this attachment using the blue plastic tool that came with your pliers (shown below) in the following way.


3. Next place this white attachment in your pliers. You are going to use this to fix your eyelet in place.

4. Take the two components of your eyelet.

5. Put the wider ring on to the white attachment (the smooth side of this will go on to the right side of your fabric).

6. Push the hole in your fabric over this part of the eyelet.

7. Place the ring on the other side of the fabric so it is resting on top of the other part of the eyelet with the fabric sandwiched between.
The picture below shows the wrong side of the ring that you will place facing the fabric.


8. Squeeze together.

9. Release the pliers. We found sometimes the attachment got stuck in the eyelet at this stage. However we found the best way to remove this was to push the attachment with your thumb through the hole in the eyelet.
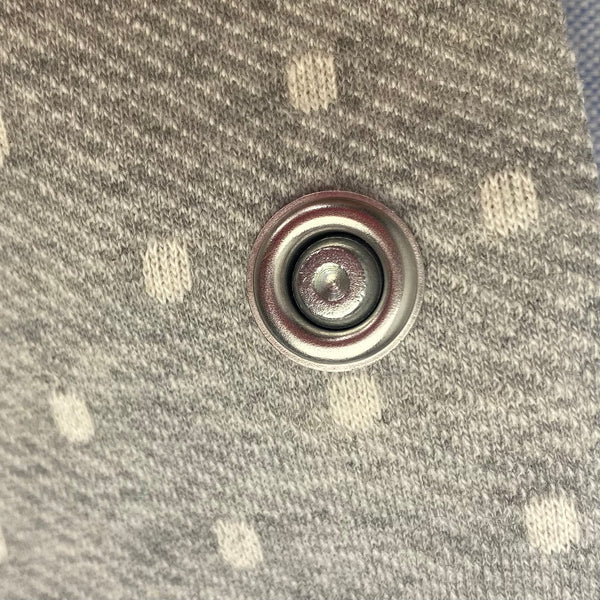
And here is the finished grommet from the right side.

Prym Vario Pliers and attachments can be found here. As the information on the back of the packet is a little brief we thought it would be good to show you how.
