This week we are talking all things bust darts.
There are a few different ways to sew a bust dart, but here's how I like to sew mine.
Tip 1 - Marking the dart
Start by clearly marking the dart on to your fabric from the pattern. I like to make sure I mark the notches on the edge of the pattern, dart legs and bust point on to the wrong side of the fabric. Then carefully pin the dart together from the edge of the pattern to the bust point.

Tip 2 - Sewing the dart
Starting at the edge of the garment sew with normal stitches to the bust point, following your markings carefully. When you are about 2-3 cm from the dart point reduce your stitch length to 1.5 - 2 mm.


Tip 3 - The dart point
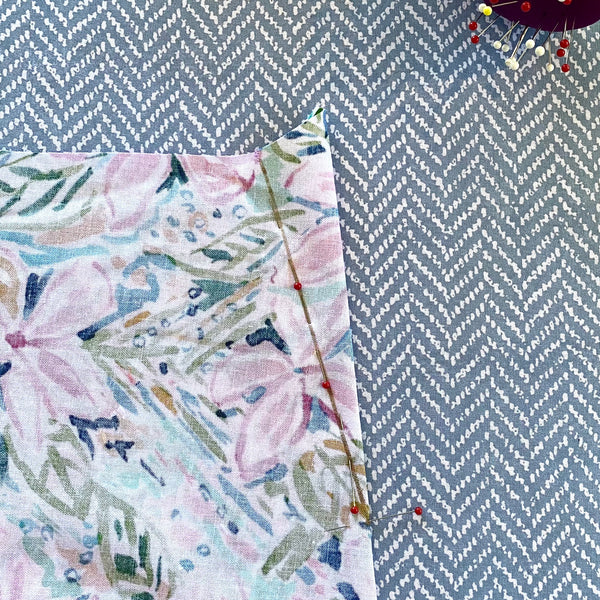
As someone who often has to alter patterns for a full bust alteration it is worth noting that how you sew the end of the dart is very important. When you are 2-3 cm out from the end of the dart (and with your reduced stitch length), start to gradually move your stitching line nearer the edge of the fabric. Aim to be at the edge of the fabric when you are about 1 cm from the dart point. Then sew exactly on the crease of the fabric for about 1 cm. This will decrease the chance of the Madonna look, as sewing off the dart suddenly can create puckers at the point.
In the picture below the black line is the dart as marked on the pattern. The blue line shows you the actual stitching line. The blue line is especially necessary if you have a bigger bust and therefore have to sew a bigger dart.

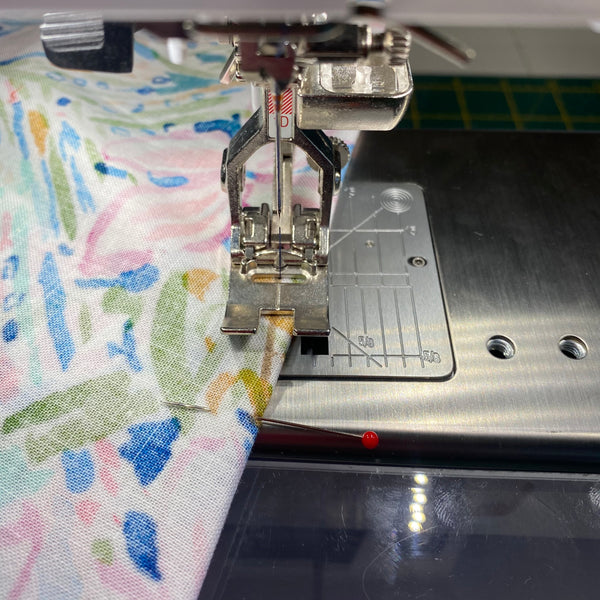
Tip 4 - Thread chain
Keeping the small stitch length, continue stitching off the fabric and dart for 2-3 cm. Lift up your presser foot and reinsert the needle in the fold of the dart. Put the foot down and complete a few stitches here to secure the stitches, creating a thread chain or loop.


Tip 5 - Pressing the dart
A bust dart is pressed towards the waist. Do not press through the point of the dart at this can create a crease.
Start by pressing the stitches to the point of the dart, but not through.

Press the dart down using a ham. The ham has two sides. The checked, wool side is for pressing wool fabrics and the white, cotton side is for pressing cotton and other similar fabrics.

Press from the back and the front of the garment using a pressing cloth and ham. Position the end of the dart over the curve of the ham.

